Haluski is this incredible combination of potato dumplings added to pan-fried cabbage and onion. I found this dish whilst investigating another recipe and stumbling across a homemade noodle similar to spaetzl. My children all love spaetzl.
You start with finely sliced cabbage and onions sauteed in butter until golden and tender.
Meanwhile, you grate 4 modest sized potatoes and combine it with some eggs, flour and seasoning and then drop this in small bits into boiling water. And, by small, I mean no more than a teaspoon as they will swell.
Were I to make changes to the recipe I think I'd want to have boiling chicken stock instead of water and then use the leftovers from the meal with the twice flavored stock and make a soup. I'm writing the recipe the way that I cooked it. I'll try to get a picture of the finished dish and add that later.
Haluski with Smoked Sausage
1 small green cabbage, washed and very thinly sliced (about softball size)
2 large shallots, peeled, halved and sliced very thin (about golf ball size ... my original called for 1 large onion)
1 stick of butter (I used a splash of olive oil before adding butter and didn't use the whole stick)
salt
4 medium potatoes, washed, grated (not HUGE baking potatoes)
2 large eggs
2 cups flour
salt & pepper
2 12-oz. pkg. Smoked Sausage, sliced thin
First, wash and thinly slice the cabbage, placing layers in a colander and sprinkling with a little salt. As you slice more cabbage keep layering in the colander with a little salt. Peel, halve and thinly slice the shallots (you could use sweet yellow or red onion for this). Slice sausages and set aside.
I let these sit for a bit to remove a little of cabbage's water. Start a dutch oven on high with lightly salted water (I actually used about 1/4 cup of soy sauce). While waiting, grate the potatoes and combine with eggs, flour, salt and any seasonings. A little garlic powder, onion powder and maybe some nutmeg might be good here, but I just used the salt and pepper. Mix all together until combined well (just get right in there with your hands... trust me, works much better).
Heat a large skillet and add a small splash of oil and 2 to 3 pats of the butter. Let butter melt and begin to brown (adjust heat as needed so butter doesn't burn). Slowly add cabbage and onions/shallots, stirring and adjusting temperature as needed. Add butter if pan shows signs of drying out.
Once water is boiling, drop scant teaspoons of potato mixture into water, keeping them separated as you would for any dumpling. They will drop to the bottom at first, but will rise to the surface as they cook through. Resist the urge to pull them out as soon as they rise as these need a couple minutes to really cook through (my recipe said 5).
Drain thoroughly cooked dumplings and add to cabbage in skillet, stirring to combine (I used my Asian ladle strainer and took finished noodles directly from water to cabbage). Add smoked sausage and stirring to mix them in evenly. Continue cooking until sausages heated through, though be sure to watch so that the pan does not dry out.
Season to taste and serve. This dish makes a lot... like enough for 8 or more people. The potato dumplings would be good on their own sauteed in a little butter before serving as a side dish or in soup.
I am definitely going to be playing with this dish as I can imagine just making the potato dumplings and giving them a toss in a little butter and cream with just a little cabbage and grated carrot and serving them with pork chops.

Cooking and recipes, projects, sewing and design work shared.
Friday, October 18, 2013
Tuesday, October 8, 2013
Project Wedding Present
My husband's niece is getting married next month, so we need a wedding gift. I was looking through her list at Target and saw she had chosen some Suzani decorated items and had a thought.
 Instead of purchasing something everyone else has, I would get some Suzani embroidery and make a table runner, placemats and napkins. They would be unique to her.

The first step was to decide which embroidery to purchase. I chose a classic Suzani design pack due to it's similarity to the design from Target. I also used the Target ones to help with color choices, keeping to what she had chosen (plus if someone else purchases the Target ones, they will coordinate!). Above is my test stitch-out of two of the designs I decided to use. The long one had to be enlarged a bit and moved. The corner piece I only flipped and moved until it lined up in a way I liked. I've used this piece to guide my colors consistently through.
I did 4 designs on each placemat ... two on each side and the rotated and repeated on the opposite side.

Here is the first finished placemat. I think I've ironed this 10 times! There are four napkins all hemmed and pressed. I'm still deciding if I want to separate out a small piece of the embroidery to do on one corner of each napkin.

I've also begun the embroidery work for the table runner. Since it is so much larger I have more area to work with. I used another border design from the package and have a medallion and some other bits to chose from. I sketched a couple different layouts before choosing what I thought would look best. At present, it's time to re-hoop for the next set of designs. I may work up one side to the middle and then the other side, maybe putting a medallion in the very center. So far, I've only decided upon these two pieces for the ends.

Here's my workspace set-up. I'm using my Project Runway to do the hems and seams while the embroidery machine works. Some of these designs take 15 thread changes. So far the biggest has been 16K stitches and 30 minutes of stitch time. When I was working on Sunday, Steve often kept peeking over my shoulder as the machine worked.
I've arranged these machines, shelves and tables three times now. I'm still not completely happy with the set up. Putting up the temporary table makes it hard to get to one side of the dining table. The big machine blocks the view of the TV for Steve when you don't want to miss the action of a game at supper time. Plus the latest move put my little dresser (lace/elastic storage) in front of the heat vent for the room, thus might have to be moved. I may reconsider the entire layout.
I currently have the table with the big embroidery machine, a commercial machine with it's own table, my dresser storage, two white shelves which hold my serger, my Project Runway machine and my straight stitch HD quilting machine. It also holds my iron, cutting tool box, embroidery supplies and ironing aides. Then there is my 10-drawer cabinet for thread, notions, and tools. Not to forget having a good size dining table, hutch, chairs, smaller cabinet for linens, and three more shelves along another wall. I definitely need to declutter this room again.

Probably, though, not until after this project is complete. Since I'm already working on the table runner and am ready to assemble the second placemat, I'm almost halfway! Then, maybe I will take another look at the room and sketch a few ideas.
Laura
The first step was to decide which embroidery to purchase. I chose a classic Suzani design pack due to it's similarity to the design from Target. I also used the Target ones to help with color choices, keeping to what she had chosen (plus if someone else purchases the Target ones, they will coordinate!). Above is my test stitch-out of two of the designs I decided to use. The long one had to be enlarged a bit and moved. The corner piece I only flipped and moved until it lined up in a way I liked. I've used this piece to guide my colors consistently through.
I did 4 designs on each placemat ... two on each side and the rotated and repeated on the opposite side.
Here is the first finished placemat. I think I've ironed this 10 times! There are four napkins all hemmed and pressed. I'm still deciding if I want to separate out a small piece of the embroidery to do on one corner of each napkin.
I've also begun the embroidery work for the table runner. Since it is so much larger I have more area to work with. I used another border design from the package and have a medallion and some other bits to chose from. I sketched a couple different layouts before choosing what I thought would look best. At present, it's time to re-hoop for the next set of designs. I may work up one side to the middle and then the other side, maybe putting a medallion in the very center. So far, I've only decided upon these two pieces for the ends.
I've arranged these machines, shelves and tables three times now. I'm still not completely happy with the set up. Putting up the temporary table makes it hard to get to one side of the dining table. The big machine blocks the view of the TV for Steve when you don't want to miss the action of a game at supper time. Plus the latest move put my little dresser (lace/elastic storage) in front of the heat vent for the room, thus might have to be moved. I may reconsider the entire layout.
I currently have the table with the big embroidery machine, a commercial machine with it's own table, my dresser storage, two white shelves which hold my serger, my Project Runway machine and my straight stitch HD quilting machine. It also holds my iron, cutting tool box, embroidery supplies and ironing aides. Then there is my 10-drawer cabinet for thread, notions, and tools. Not to forget having a good size dining table, hutch, chairs, smaller cabinet for linens, and three more shelves along another wall. I definitely need to declutter this room again.
Probably, though, not until after this project is complete. Since I'm already working on the table runner and am ready to assemble the second placemat, I'm almost halfway! Then, maybe I will take another look at the room and sketch a few ideas.
Laura
Sunday, September 15, 2013
Fresh Tomato Pasta Sauce
What would summer be without glorious fresh tomatoes? About mid-January I start really wishing for the fresh taste of home-grown tomatoes, making spring seem just too far away.
Garden fresh tomatoes, to me, defines what the word Summer means.
When I was a teenager, my Mother used to can or freeze any and everything she could to feed us over the winter. Tomato juice, diced tomatoes, green beans, sauerkraut, kosher pickles (whole, sliced and spears), bread and butter pickles, jellies and jams, and apple juice (which went into the freezer).
In my new home, I do not yet have a garden. But, still wanting to enjoy fresh tomatoes, I planted six large patio pots with various tomatoes, although I cannot say they were totally successful. Next year, I will have three raised planting beds for garden space along with the pots from this year. Lucky for me, my neighbor is having a bumper tomato crop this year.
So, while making batches of salsa, tomato jam and diced tomatoes, I decided that some summer-fresh pasta sauce was definitely needed. Once I added the pasta in I should just have stood back! Not only do I not have pictures, I don't even have leftovers! That is how I know a recipe is a keeper.
Fresh Tomato Pasta Sauce
makes about 3 quarts
3 lbs. Roma tomatoes (cherry or plum work ok too), washed, halved
1/2 lb. ground turkey
1 lb. ground beef (85/15)
1 medium carrot, grated
1 small summer squash, grated
1/2 each, fist sized green, red and yellow pepper, diced on the small side
6 to 8 fresh basil leaves, washed, chiffonade
To taste: garlic powder, onion powder, soy sauce, salt, black pepper.
1 lb. cooked Pasta of your choice, reserve 1/2 cup cooking water
Halved tomatoes should half fill a dutch oven or 6 qt. stock pot. Start tomatoes on med. heat until they begin to boil. Stir as needed to prevent sticking. Once tomatoes begin to boil reduce heat. Each time tomatoes return to a boil, reduce heat. Cook tomatoes until they resemble coarse applesauce in texture.
Chiffonade fresh basil leaves and add to tomatoes and stir. Season tomato sauce with salt and black pepper, garlic and onion powders, to taste.
Grate carrot and summer squash and add to tomatoes and allow to cook about 15 min. Add diced peppers and cook another 5, stirring as needed.
Mix turkey and beef together, season with 3 to 4 Tbsp. soy sauce. Add to tomato sauce and cook, stirring occasionally, until beef is broken up and completely cooked through. Allow to cook 5 to 10 before tasting to adjust seasonings.
Add cooked pasta to tomato sauce in pot and allow to cook about 10 to 15 minutes, so pasta takes in flavor from sauce. Taste and adjust seasonings.
NOTES: This is a simple sauce, but it does take a little time to cook down to the desired consistency. You may be able to let this cook in a crock pot, adding noodles just before serving. All the measurements are my best guess. Who thinks to measure when they are making something on the fly?
Grating vegetables the family won't eat is a great way to add body to the sauce. Trust me, they won't know unless you tell them. The vegetables can be anything you happen to love or have in the fridge and need to be used.
You can use any kind of pasta you like. If the sauce is too thick after adding the pasta, use reserved cooking water to thin. Just remember to taste after adding cooking water to adjust seasonings to your tastes.
To chiffonade fresh basil leaves, gather 6 to 8 leaves, wash and stack one on top of the other. Roll length wise or side-to-side and slice in 1/8 inch strips with a sharp knife. You want to cut them not crush them. Once chiffonaded, I let mine unroll and then chopped the strips into smaller pieces. If you don't have fresh basil available, you can use dried basil (apx. 1 tsp.).
It's a good thing for me that I had tasted this because I sat down on the couch after cooking and fell asleep! My guys ate almost all of this before I woke up! I was lucky they left me about a cup's worth!
Laura
Garden fresh tomatoes, to me, defines what the word Summer means.
 |
| Summer morning glories |
In my new home, I do not yet have a garden. But, still wanting to enjoy fresh tomatoes, I planted six large patio pots with various tomatoes, although I cannot say they were totally successful. Next year, I will have three raised planting beds for garden space along with the pots from this year. Lucky for me, my neighbor is having a bumper tomato crop this year.
So, while making batches of salsa, tomato jam and diced tomatoes, I decided that some summer-fresh pasta sauce was definitely needed. Once I added the pasta in I should just have stood back! Not only do I not have pictures, I don't even have leftovers! That is how I know a recipe is a keeper.
Fresh Tomato Pasta Sauce
makes about 3 quarts
3 lbs. Roma tomatoes (cherry or plum work ok too), washed, halved
1/2 lb. ground turkey
1 lb. ground beef (85/15)
1 medium carrot, grated
1 small summer squash, grated
1/2 each, fist sized green, red and yellow pepper, diced on the small side
6 to 8 fresh basil leaves, washed, chiffonade
To taste: garlic powder, onion powder, soy sauce, salt, black pepper.
1 lb. cooked Pasta of your choice, reserve 1/2 cup cooking water
Halved tomatoes should half fill a dutch oven or 6 qt. stock pot. Start tomatoes on med. heat until they begin to boil. Stir as needed to prevent sticking. Once tomatoes begin to boil reduce heat. Each time tomatoes return to a boil, reduce heat. Cook tomatoes until they resemble coarse applesauce in texture.
Chiffonade fresh basil leaves and add to tomatoes and stir. Season tomato sauce with salt and black pepper, garlic and onion powders, to taste.
Grate carrot and summer squash and add to tomatoes and allow to cook about 15 min. Add diced peppers and cook another 5, stirring as needed.
Mix turkey and beef together, season with 3 to 4 Tbsp. soy sauce. Add to tomato sauce and cook, stirring occasionally, until beef is broken up and completely cooked through. Allow to cook 5 to 10 before tasting to adjust seasonings.
Add cooked pasta to tomato sauce in pot and allow to cook about 10 to 15 minutes, so pasta takes in flavor from sauce. Taste and adjust seasonings.
NOTES: This is a simple sauce, but it does take a little time to cook down to the desired consistency. You may be able to let this cook in a crock pot, adding noodles just before serving. All the measurements are my best guess. Who thinks to measure when they are making something on the fly?
Grating vegetables the family won't eat is a great way to add body to the sauce. Trust me, they won't know unless you tell them. The vegetables can be anything you happen to love or have in the fridge and need to be used.
You can use any kind of pasta you like. If the sauce is too thick after adding the pasta, use reserved cooking water to thin. Just remember to taste after adding cooking water to adjust seasonings to your tastes.
To chiffonade fresh basil leaves, gather 6 to 8 leaves, wash and stack one on top of the other. Roll length wise or side-to-side and slice in 1/8 inch strips with a sharp knife. You want to cut them not crush them. Once chiffonaded, I let mine unroll and then chopped the strips into smaller pieces. If you don't have fresh basil available, you can use dried basil (apx. 1 tsp.).
 |
| Praying Mantis on my dining room window. |
It's a good thing for me that I had tasted this because I sat down on the couch after cooking and fell asleep! My guys ate almost all of this before I woke up! I was lucky they left me about a cup's worth!
Laura
Friday, September 6, 2013
Noisy Mornings
I usually like to write my blog posts in the morning, but with school having started, it messes my schedule up. Mostly because I have a night owl who doesn't want to go to sleep at bedtime and doesn't want to get up in the morning. Ah, teenagers.
So, this messes up my morning because I get stressed when he comes downstairs 2 minutes before the bus with socks in hand instead of on his feet. We wake him with time to dress and eat (although I would have thought by 16 you'd figure out how the alarm clock works). He lags so long I made muffins that he can grab and dash out the door with.
We live on a pretty good size highway and the bus stops directly in front of the house. I know it used to drive me crazy waiting for kids to cross the road and take a seat, no care in the world that they were holding anyone up. So, once stressed I need a while to become calm enough to put words together in decent sentences.
Thank God for coffee.

Along another line, my babies opened their eyes and began running around the yard. They are like little pinballs. I already had to save one from a window well. They get panicked and just jump right in and then are terrified when you pull them out. These guys are so tiny. One could sit in my hand cupped. Though, when pulling bunnies out of window wells, I've learned to just lift the bunny and let'em run. They seem to calm down sooner.
Yesterday, I scared one of them because my honeydew melon fell out of my hands and rolled into some long grass where he was hiding. He ran in front of me and under my car and looked to be headed for the garage. Hopefully he didn't go in the garage, but around to the other side. Steve did check, but didn't see any babies in there. It would be awful for one to be stuck inside when it's hot.

The recipe I want to use involves roasting the halved tomatoes to loosen the skin and then canning as chopped or crushed tomatoes. Since I use piles of these, I decided that would be the simplest. I may want to get more to make salsa. I also have some prune plums to make plum chutney. Yep, busy, busy.
Add in laundry and sewing and it sounds like a fun day to me. Then cheeseburger casserole for dinner. So in and out of the kitchen, plus out to water my poor plants. The tomatoes are considering conking out. The patty pan is going into overdrive with leaves. My peppers are still shooting out lots of fruit. I also took all my houseplants outside and repotted them. They are very contented on our back patio out of direct line of the sun.

Morning glories to brighten everyone's day. Time to start the tomatoes.
Laura
So, this messes up my morning because I get stressed when he comes downstairs 2 minutes before the bus with socks in hand instead of on his feet. We wake him with time to dress and eat (although I would have thought by 16 you'd figure out how the alarm clock works). He lags so long I made muffins that he can grab and dash out the door with.
We live on a pretty good size highway and the bus stops directly in front of the house. I know it used to drive me crazy waiting for kids to cross the road and take a seat, no care in the world that they were holding anyone up. So, once stressed I need a while to become calm enough to put words together in decent sentences.
Thank God for coffee.
Along another line, my babies opened their eyes and began running around the yard. They are like little pinballs. I already had to save one from a window well. They get panicked and just jump right in and then are terrified when you pull them out. These guys are so tiny. One could sit in my hand cupped. Though, when pulling bunnies out of window wells, I've learned to just lift the bunny and let'em run. They seem to calm down sooner.
Yesterday, I scared one of them because my honeydew melon fell out of my hands and rolled into some long grass where he was hiding. He ran in front of me and under my car and looked to be headed for the garage. Hopefully he didn't go in the garage, but around to the other side. Steve did check, but didn't see any babies in there. It would be awful for one to be stuck inside when it's hot.
more Bunnie cuteness
Later today I am going to be working with tomatoes. My neighbor's tomatoes went into overdrive and she gave me an entire bucket of plum tomatoes. I hope it's enough, otherwise I might have to get some more. I gave her a chocolate banana bread with chocolate chips. I will try to remember to take pictures.The recipe I want to use involves roasting the halved tomatoes to loosen the skin and then canning as chopped or crushed tomatoes. Since I use piles of these, I decided that would be the simplest. I may want to get more to make salsa. I also have some prune plums to make plum chutney. Yep, busy, busy.
Add in laundry and sewing and it sounds like a fun day to me. Then cheeseburger casserole for dinner. So in and out of the kitchen, plus out to water my poor plants. The tomatoes are considering conking out. The patty pan is going into overdrive with leaves. My peppers are still shooting out lots of fruit. I also took all my houseplants outside and repotted them. They are very contented on our back patio out of direct line of the sun.
Morning glories to brighten everyone's day. Time to start the tomatoes.
Laura
Thursday, August 29, 2013
Babies

It's a good thing babies are so cute, otherwise, most of us would perish, wouldn't we? Babies are designed cute and harmless.
I've also been dead-heading my sunflowers and putting them on the table on my back patio only to be gifted by the arrival of several mated pairs of American Finches ... the males a beautiful golden color with black wings. The females are much more toned down. I have had 4 separate males here all battling for the right to eat at the table and bring their mates in. Mostly, I have 2 pairs. I finally put some heads down in the rock border surrounding the patio, thereby giving more birds a chance to eat.
I've also seen two cardinal males upon occasion. I think the sunflower seeds bring them in as well. I am going to start putting sunflower heads back for the winter. I am going to sort them by black, purple and white into separate bags so that I can put them out over the winter.
I've also lately seen a hummingbird at my sunflowers amongst the assorted bees and wasps. I cherish each bee I see since we seem to be having troubles with bees. If I could maintain it, I would put a beehive in the yard, but I fear not being able to keep up with it's maintenance.


I am so totally enjoying all the wildlife to watch. Right now during the heat, though, all I'm really seeing are the finches. They put on a riot of a show. I've also got my garden going full ahead with banana peppers, patty pan squash and nibbles of cherry tomatoes. I have a few plum tomatoes, but not enough to be more than a lunch salad. I also have two regular peppers, but they never got on strong enough in their pots to make serious peppers.
Next year, I will have three 2by4 garden beds that I need to assemble, fill with soil and have ready for next year. I am thinking 3 beds are a good start along with pots. I will build 4 more beds for the following year and I think that along with pots should more than keep me busy. I also have separate sections of the yard I want to landscape along with replacing the nasty plastic landscape border for our rock edges. I have never figured out why anyone would choose plastic landscape edge by choice, but I have to admit, if you want to quickly edge something it is super easy.
On the other hand, it looks really cheesy. So, I want to replace ours with some kind of stone or brick border that keeps the stones in places while allowing my Steve to mow quickly along it's edges without having to resort to nasty weed killer sprays. The weed killer almost always sprays beyond what you want killed leaving dead grass or yard perennials in it's path.
Since this is our first year in this house, I've really only worked at landscaping a small portion and to keeping such landscape without a certain space making mowing a really easy job. I've told him, if it is in a landscape bed it's a plant, if it's not, it's a weed! Mow it down! This really makes it so much easier for him to deal with. I am also going to take the curves from the landscape that was here, out. Why make "more" work? Seems silly to me. I want clean lines that make it easy for the mower to follow.
This leaves me huge amounts of space to landscape, especially where we've taken out dead plant material. I will be working in a space next year that I am using for a potted plant garden this year. I already have one of the shrubs to go in the space that I'm nursing along to make sure it will survive.
I have a double Rose of Sharon in purple shades at my old house in Spring Valley. This shrub shoots off seeds and babies at a rate that allows me to give babies to anyone who'd like. Sometimes the new shrub features singles, but mostly gives off double flowered blooms in shades of purple. I have two seedlings to transplant here that I put in a bucket to be sure they would survive. I will transplant them shortly, once hot weather has passed, into their new home.
I am also planning to purchase winter cover for this shrub as well as two roses I planted last Mother's day. Some plants need winter support. I am hoping to move a few more Iris yet and some various snippets of hosta plants before I sell that house. I have beautiful antique purple iris that smell awesome. I also found some yellow ones at the house that really just went gangbusters once I showed them some love.
Hostas are my favorites, though. I have tried to grow a few blue ones that I've not had success with, but I have a nice group of Patriots and Gold Drops that have done very well. I also have the basic green with the large leaves and the smaller pointed leaves. Those always grow like crazy in decent soil. I've tried to grow Mouse Ears, but, maybe didn't get it into the ground soon enough. I'll try some more species Hostas again once I get a more settled garden.
Hostas are beautiful mixed in with daylillies or other perennials, but also just as borders by themselves or mixed in with Coral Bells. I also have several perennial herbs I would like to establish in a regular kitchen garden. So much to do!
Laura
Wednesday, August 21, 2013
I promised ...
A recipe today for my daughter Josie.
Last week when she was staying with us we made homemade pizzas from the dough up. They came out so well there were barely any leftovers, and any that where didn't make it until lunch!
This is not a recipe I made I designed myself. The recipe comes from Cook's Country, the April/May 2013 issue. I finally was able to read it all the way through. This is a supper easy pizza that doesn't take a lot of time and it could be adjusted to be started the day before to be finished the next day for those of you with busy schedules.
You start by making a yeast dough and letting it rise until doubled. Once it's reached this point, you could refrigerate it overnight to bake the next day. On the next day, roll out to fill a sheet pan, pushing it with your fingers to get it into all the corners (oh, let it come to room temp, first, please!).
Once you've got this baby rolled out on your sheet pan, cover it with a nice, clean kitchen towel and let it rise briefly ... about 20 minutes.
While dough is finishing rising, make the sauce and adjust your oven so the rack is in the lowest portion of the oven. The sauce is very easy and takes only a couple minutes to cook. A plus, you can add or leave out things you don't like.
Now, with your sauce done and your toppings assembled spring your pizza with grated Parmesan and make little indentations all over the pizza. Bake this for 7 to 10 minutes, just until the parm starts to melt. Pull it out and spoon sauce over pizza, covering to within 1-inch of the border. I am not fond of lots of crust, so I brush out as far as I could.
Bake the crust 7 to 10 minutes more until sauce is deep red and steaming. Now add your toppings and your cheese and bake about 12 minutes more. Let rest 5 minutes before cutting. You know that is the hardest part, waiting to cut the pizza! Who ever waits? I'd love to know.
This makes a lot of pizza. 2 sheet pans filled up 2 teenagers, 1 hungry husband and myself. And, I did not get ANY pictures! I seriously need to make this again so I can take pictures of the whole process.
Sheet Pan Pizza
Crust
1 3/4 cups warm water (110 degrees)
1/2 cup plus 1 Tbsp olive oil
1 Tbsp sugar
5 cups flour
4 1/2 tsp instant or rapid rise yeast
2 teaspoons salt
Sauce
1 Tbsp olive oil
3 garlic cloves, minced
1 1/2 tsp dried oregano
1/4 tsp red pepper flakes
2 Tbsp tomato paste
1 28-oz. can crushed tomatoes
Salt
3 oz. Parmesan Cheese, grated (1 1/2 cups)
12 oz. mozzarella cheese, shredded (3 cups)
2 Tbsp chopped fresh Basil
Grease large bowl. Combine water, 1/4 cup olive oil and sugar in 2 cup liquid measuring cup. Using stand mixer fitted with dough hook, mix flour, yeast and salt on low until combined. Increase speed to medium and add water mixture, and knead until dough is uniform in texture, about 3 minutes. Transfer dough to prepared bowl, cover with plastic wrap and let rise at room temperature until doubled (1 to 1 1/2 hours).
Evenly coat rimmed baking sheet with 1/4 cup oil. On lightly floured work surface, use rolling pin to roll dough into 16 by 12 inch rectangle. Transfer dough to prepared sheet and stretch dough to cover sheet, pressing dough into corners. Brush dough evenly with 1 Tbsp oil and cover with plastic wrap. Set in warm spot (not oven) until slightly risen, about 20 minutes)
Sauce and toppings:
Heat oil in large saucepan over medium heat until shimmering. Cook garlic, oregano and pepper flakes until fragrant (this is blooming the flavors), about 30 seconds. Stir in tomato past and cook until just beginning to brown, about 2 minutes. Add tomatoes and simmer until reduced to 3 cups, about 10 minutes. Off heat, season with salt to taste.
Move oven rack to lowest position and heat oven to 450 degrees F. Remove plastic and sprinkle dough with 1 cup Parmesan and bake until cheese begins to melt. Remove sheet from oven and spoon sauce over pizza leaving 1 inch border (but you don't have to). Bake until sauce is deep red and steaming, 7 to 10 minutes.
Spring mozzarella and remaining 1/2 cup Parmesan evenly over sauce. Now is the time to add what ever toppings your little heart desires. You know mine was covered, edge-to-edge, with cheese! Bake pizza about 12 minutes, then remove and let sit 5 minutes before cutting. Sprinkle with basil and serve!
We used green onion brat slices, green olives, black olives, vidalia onion, green and red pepper and anything else we could lay our hands on.
Now to work on that organization process I've started. I'm ready for a couple more shelves, which means a trip to Spring Valley with the *big boy* (Stevie's red truck). I just won't get everything I want to bring down in my Pup (my HHR). A bit frustrating as that truck takes 2x as much gas, guaranteed! And, to me it feels like I'm driving a bus!
Laura
Monday, August 12, 2013
High School to College
It feels like forever since I've been able to write a blog post. I like to write in the morning while it's still quiet, but something about having more than 2 of my 4 children around makes my house too noisy!

But, I still have plenty of pictures! Small side-track ... above is an American Finch male. Isn't he gorgeous? I wanted to put something beautiful in here before my school rants. I so apologize. I cannot be the only person who finds these things to be pesky problems.
Back to the first thought ...
Josie and I have been touring area colleges in anticipation of next fall. Josie will graduate June 2014. She's very excited about the prospect of going on to college. To say we've been bombarded with college information ... oh wow! She did finally decide on her major and then immediately decided two would be better. What it really is breaking down to right now is can she do any cooking in the dorm and what kind of work options are available. This, of course, is after we've determined they have the courses to support the double major. We'll see who the winner is come May for financial aide packages.
Meanwhile, I've been going to the high schools and registering a senior and a sophomore to return to school. Both schools automatically assume you are a) been local for years and b) completely healthy. The reason I say that is, for Josie's school, Sterling High School, their registration was poorly marked to it's location in a large high school building and had NO handicap parking of any sort. Then, these kind people threaded you around a good 1/3 of the school leaving you well away from wherever you were parked!
I cannot say Jacob's school was much better. First, he is a special education student. We live in the ROWVA district, but he goes to Knoxville High School. To be even more confusing, ROWVA registered 7/25 (which I did not know), while Knoxville was 8/8. Now for the real confusion. Knoxville sent me a letter about 2 days after ROWVA's registration telling me to register him there, but ROWVA didn't know what to do with me when I showed up to do so. They sent me to Knoxville. Knoxville had their registration at a junior high that I had no clue where it was (I now have a map of Knoxville ... I only go there for school things). I get to the junior high only to find they have no schedule for him ... can I go back to the high school? Only to find the special education schedules aren't ready. I hope he's registered for school. Let's not talk about their handicap parking accommodations either.
I am failing to understand why it must be so complicated to register a child for high school. Why must you wander through large parts of the building? Or even wander at all? Why not use a gym for whichever school is largest and do everything in one place, CLEARLY marked? And, make parking places near the door clearly marked for handicap individuals?
And, why can we not have a basic list of supplies for high schoolers at this registration? Surely most teachers have taught this class before? By the time classes start, sales for supplies are well over and you end up paying full price or higher for this "special" supply item that the child seems to end up not using. Yes, call me confused for this.
I can at least say that ROWVA's handicap parking makes better sense than Sterling's or Knoxville's. At least it's near the door you need. And, give college's credit, they have handicap parking all over the place (though sometimes it's frustrating to find if they also have construction ... laugh). And, if you remember to tell them beforehand, really try to make touring the campus easy.
So, while summer has been full of one child or another needing me to help them with something, soon it will be quiet with at least 3 of them off to one school or another. And, hopefully, the one not in school will be on a better schedule as well. Now to enjoy another cup of coffee and clean out my email box, then, maybe, enjoy a little sewing.
Laura
Thursday, August 1, 2013
College Top
Fabric doesn't just call my name, it leaps at me begging, kicking and screaming to come home. To say I have a fabric stash is like saying the Smithsonian is a small collection. This said, what did I do? Buy more fabric!
What else could I do? It was literally crying to be made into a top to match my summery blue pants!

Soft blue ruffles, perfect for a summer top. One yard was more than enough for this easy summer top. I found the pattern online. It works for shorter tops, tunic tops, short dresses or even a maxi. I decided tunic length was perfect for me, although the yard would have made the perfect length short dress.
I made this top for touring Augustana College with my daughter Josie. Looks like I picked right as the sun is shining and the sky is almost the same color as my shirt.
To make your own version just follow these steps.
First, measure from the middle of the back of your neck down your shoulder to where you'd like your sleeve to end. This is the width of each panel of your shirt.
Measure from the top of your shoulder down your body to were you'd like your top to end (or do it the way I did, cut it the length of your fabric piece and then trim it when you're ready to hem). This is the length of your rectangles.
Cut 4 rectangles total. Start by sewing two rectangles together at one of the short sides. Repeat this with the second set of rectangles. Pin the rectangles together lengthwise measuring down from the shoulder seam for the front and back necklines. Put pins at each of these spots.
Sew the front and back seams together between the pins, then hem your neckline. I usually add a hanger strap at the shoulder seam at this point.
Now decide how wide to leave your sleeve openings. Mine were about 10 inches. Easier, try your shirt on and mark one opening where it feels comfortable. Transfer this marking to the other side of the shirt and sew both side seams. If it's easier to hem the sleeves before sewing the seams, now is the time, otherwise hem them after.
Now, try your top on and double check the length. You may decide you want it shorter or you might want to taper more under the arms. Depending upon what look you are going for and what type of fabric, you may chose not to do hems, just leave them raw.
Now for the best part of an easy shirt! Wear it!!! This is the second of these I've made. I already have fabric for another and am considering cutting some rectangles to make 3/4 length sleeves. And, then to make another maxi, a dress and several more tops!!
It's easier to write about it than to remember to take photos every step of the way, but when I make the next top, I'll take photos and edit them into this post.
Laura
What else could I do? It was literally crying to be made into a top to match my summery blue pants!
Soft blue ruffles, perfect for a summer top. One yard was more than enough for this easy summer top. I found the pattern online. It works for shorter tops, tunic tops, short dresses or even a maxi. I decided tunic length was perfect for me, although the yard would have made the perfect length short dress.
I made this top for touring Augustana College with my daughter Josie. Looks like I picked right as the sun is shining and the sky is almost the same color as my shirt.
To make your own version just follow these steps.
First, measure from the middle of the back of your neck down your shoulder to where you'd like your sleeve to end. This is the width of each panel of your shirt.
Measure from the top of your shoulder down your body to were you'd like your top to end (or do it the way I did, cut it the length of your fabric piece and then trim it when you're ready to hem). This is the length of your rectangles.
Cut 4 rectangles total. Start by sewing two rectangles together at one of the short sides. Repeat this with the second set of rectangles. Pin the rectangles together lengthwise measuring down from the shoulder seam for the front and back necklines. Put pins at each of these spots.
Sew the front and back seams together between the pins, then hem your neckline. I usually add a hanger strap at the shoulder seam at this point.
Now decide how wide to leave your sleeve openings. Mine were about 10 inches. Easier, try your shirt on and mark one opening where it feels comfortable. Transfer this marking to the other side of the shirt and sew both side seams. If it's easier to hem the sleeves before sewing the seams, now is the time, otherwise hem them after.
Now, try your top on and double check the length. You may decide you want it shorter or you might want to taper more under the arms. Depending upon what look you are going for and what type of fabric, you may chose not to do hems, just leave them raw.
Now for the best part of an easy shirt! Wear it!!! This is the second of these I've made. I already have fabric for another and am considering cutting some rectangles to make 3/4 length sleeves. And, then to make another maxi, a dress and several more tops!!
It's easier to write about it than to remember to take photos every step of the way, but when I make the next top, I'll take photos and edit them into this post.
Laura
Friday, July 26, 2013
"Fried" Green Tomatoes & My Mother's Garden
There's just something about the taste of a slice of green tomato, lightly breaded and fried to crispy golden perfection. Tangy and crunchy with a little bit of sweetness, which is even better reheated with a little Colby Jack cheese for breakfast.

But, take them to the next level and keep your kitchen cleaner by using your Pizza Pizazz and eliminating the grease. I definitely should have tried this much sooner! It's so much easier to wash a pizza tray and wipe down the counter than to clean grease splatters off the wall, over the stove microwave and the stove itself, not to mention drips of egg and breading, and, anything that might make it to the floor.
Plus, there is just so much more room to work on my countertop! Places to set the eggs, cornstarch, crumb mix, and a tray for the finished slices.
First, though, it helps to have some place to secure several nice green tomatoes. A place like your mother's garden! I only took a couple Mom, really. You've a whole pile more on the way and should be nice and ripe by the time you're back.

My Mom didn't get a chance to plant much before she had a family matter to deal with. Her garden doesn't look too bad. Maybe it's just missing her.

Now she can come in an get an update. These stargazer lilies look awesome. The yellow daylilies are basking in their sunny position.

And, since your porch is so quiet, a pair of wrens have set-up housekeeping above your clock.

Complete with little chirping babies. They will probably be flying by the time you get back, so no worries. The parents were hanging around in the nearby lilac bush when we would come outside. They are obviously used to my Mom being around because, while I was sitting in her chair, they had no problem with my being there and taking pictures.

He seemed quite content to pose for this picture for me. Momma was already in the nest with the worm she picked out of the lawn. But as soon as they flew off for the next worm, you could hear the little ones chirping away.

So, all's quiet and mowed. And, there will be nice ripe tomatoes in a week or so. Now, I just need to get my own bottle tree for my yard. BTW, that little bird house to the left also has a little nest in it, so more birds all over. I'm sure they miss my Mom feeding and watering and roaming around.
"Fried" Green Tomatoes
4 to 6 medium green tomatoes, sliced 1/2 to 1/4 inch thick
cornstarch ... I mix in a little masa harina with mine
salt
2 eggs
1/4 cup water
1 cup Italian bread crumbs
1/2 cup Parmesan cheese
1 tsp Salt ... if you use Hickory Smoke Salt it adds an amazing taste to the finished product
2 Tbsp. dried parsley ... you can use fresh, I was out
1 tsp. garlic powder
1 tsp. onion powder
Slice your green tomatoes about 1/2 to 1/4 inch thick. If you want crisper, go thinner. Place on several layers of paper towels and sprinkle with salt. Let set while you set up the pizza maker (this removes excess water).
Start your countertop pizza maker. Spray a round pizza pan and place it in the pizza maker to heat up.
Set up three pie plates in a row. Place cornstarch in the first pan. Whisk 2 eggs with water and place in the second plate. In the last plate mix crumbs, cheese, salt, parsley, garlic and onion powder.
Once the pizza maker is warmed up, start by placing several tomato slices in cornstarch and lightly coating both sides. Tap off any excess. Dip each slice in egg, coating both sides. Then place in crumb mix and coat each side.
Place each slice on the hot pizza pan and once the tray is full set the timer for about 18 minutes. About halfway through, once the first side is nicely browned, you will need to flip each slice. I just used a pair of tongs and flipped them as they came around.
Each batch takes about 15 to 20 minutes to cook through. Best part, they don't need to be drained. Now, to keep the spouse from eating them as they come off the pizza maker ... if you can.
Notes: I usually need 4 to 5 tomatoes for my husband and myself. We LOVE green tomatoes this way. If you just want to try them, you should be fine with 3 for 2 people. You can also use thinly sliced summer squashes for this or with the tomatoes. I'm still playing with my recipe and I think I make changes every time I do. Next year I'm going to try one of those heirloom tomato plants that ripens green. Oh, and plant more tomatoes!
I placed a large slice of tomato on my hamburger for dinner and topped it with the usual stuff. Delicious.
Laura
But, take them to the next level and keep your kitchen cleaner by using your Pizza Pizazz and eliminating the grease. I definitely should have tried this much sooner! It's so much easier to wash a pizza tray and wipe down the counter than to clean grease splatters off the wall, over the stove microwave and the stove itself, not to mention drips of egg and breading, and, anything that might make it to the floor.
Plus, there is just so much more room to work on my countertop! Places to set the eggs, cornstarch, crumb mix, and a tray for the finished slices.
First, though, it helps to have some place to secure several nice green tomatoes. A place like your mother's garden! I only took a couple Mom, really. You've a whole pile more on the way and should be nice and ripe by the time you're back.
My Mom didn't get a chance to plant much before she had a family matter to deal with. Her garden doesn't look too bad. Maybe it's just missing her.
Now she can come in an get an update. These stargazer lilies look awesome. The yellow daylilies are basking in their sunny position.
And, since your porch is so quiet, a pair of wrens have set-up housekeeping above your clock.
Complete with little chirping babies. They will probably be flying by the time you get back, so no worries. The parents were hanging around in the nearby lilac bush when we would come outside. They are obviously used to my Mom being around because, while I was sitting in her chair, they had no problem with my being there and taking pictures.
He seemed quite content to pose for this picture for me. Momma was already in the nest with the worm she picked out of the lawn. But as soon as they flew off for the next worm, you could hear the little ones chirping away.
So, all's quiet and mowed. And, there will be nice ripe tomatoes in a week or so. Now, I just need to get my own bottle tree for my yard. BTW, that little bird house to the left also has a little nest in it, so more birds all over. I'm sure they miss my Mom feeding and watering and roaming around.
"Fried" Green Tomatoes
4 to 6 medium green tomatoes, sliced 1/2 to 1/4 inch thick
cornstarch ... I mix in a little masa harina with mine
salt
2 eggs
1/4 cup water
1 cup Italian bread crumbs
1/2 cup Parmesan cheese
1 tsp Salt ... if you use Hickory Smoke Salt it adds an amazing taste to the finished product
2 Tbsp. dried parsley ... you can use fresh, I was out
1 tsp. garlic powder
1 tsp. onion powder
Slice your green tomatoes about 1/2 to 1/4 inch thick. If you want crisper, go thinner. Place on several layers of paper towels and sprinkle with salt. Let set while you set up the pizza maker (this removes excess water).
Start your countertop pizza maker. Spray a round pizza pan and place it in the pizza maker to heat up.
Set up three pie plates in a row. Place cornstarch in the first pan. Whisk 2 eggs with water and place in the second plate. In the last plate mix crumbs, cheese, salt, parsley, garlic and onion powder.
Once the pizza maker is warmed up, start by placing several tomato slices in cornstarch and lightly coating both sides. Tap off any excess. Dip each slice in egg, coating both sides. Then place in crumb mix and coat each side.
Place each slice on the hot pizza pan and once the tray is full set the timer for about 18 minutes. About halfway through, once the first side is nicely browned, you will need to flip each slice. I just used a pair of tongs and flipped them as they came around.
Each batch takes about 15 to 20 minutes to cook through. Best part, they don't need to be drained. Now, to keep the spouse from eating them as they come off the pizza maker ... if you can.
Notes: I usually need 4 to 5 tomatoes for my husband and myself. We LOVE green tomatoes this way. If you just want to try them, you should be fine with 3 for 2 people. You can also use thinly sliced summer squashes for this or with the tomatoes. I'm still playing with my recipe and I think I make changes every time I do. Next year I'm going to try one of those heirloom tomato plants that ripens green. Oh, and plant more tomatoes!
I placed a large slice of tomato on my hamburger for dinner and topped it with the usual stuff. Delicious.
Laura
Wednesday, July 24, 2013
It's Still Quiet ...
I'm just having a nice quiet cup of coffee before leaving my house. It's so nice to be in my fairly clean living room with no TV, kids or other distractions.
I've tried several different times to come in and write a blog post, but get interrupted so often it's not even funny anymore.

I have been dealing with my son for several weeks. Earlier this month he was introduced to a girl and she took his debit card and about 300 of his income almost making him homeless. With his disabilities, he's OK most of the time, but sometimes can get overwhelmed if tired, hungry or frustrated.
Right now he's in my basement with one of his computers. I can hear him down there talking to the computer. If he's online, he may be talking to his dad.
Meanwhile, the oldest daughter is in Texas helping my parents clean out the house of my mother's oldest brother, who passed away earlier this spring. It's been a job involving dumpsters and they are still not finished. Jess might get to see the Gulf of Mexico as a birthday present. She is going to love that. I might never get her to come home, lol.
My younger daughter has been dividing her time between helping me with Matt, helping me with a house I need to empty and college visits. We've just begun the college visit season with about 6 more visits scheduled. I'm sure we will be filling out paperwork sometime in September for the ones she liked best. So far, ISU is in the top 5.

Love this picture of one of my sunflowers with the bees. My garden took a hit earlier this week with a very windy rainstorm. I lost half of one of my pepper plants and picked up three green tomatoes from plants that were knocked over. Everything will be fine. Next year, 3 garden beds and I will put more soil in the pots so they tip less. I can't wait for next year's garden season, but then there will be January for planning it.

And, for planning my landscaping. Since big projects are somewhat out of my scope, I chose one area of the yard to work in. I still have a ways to go, but the long-term goal is to have garden space for herbs and vegetables. Second, to have enough annuals, perennials and biennials for a nice cutting bed for flowers.
I truly believe every family, no matter the income, should sit down two to three times a week at a table together. I also think flowers really make a difference. Sometimes they start the dinner conversation, but it's the conversation that should become the feature. Talking with one's children and taking them seriously, it really makes a difference. And, since my table flowers are a regular feature, I will let one of the kids pick the flowers out and arrange them if they want, too.

Now I'm off for the next part of my day. I have a disability appeal. It has been so difficult not to think about it all the time, but I've just been working to pass it to my higher power and trust that the right thing will happen, and then to focus on the things I really can change.
Laura
I've tried several different times to come in and write a blog post, but get interrupted so often it's not even funny anymore.
I have been dealing with my son for several weeks. Earlier this month he was introduced to a girl and she took his debit card and about 300 of his income almost making him homeless. With his disabilities, he's OK most of the time, but sometimes can get overwhelmed if tired, hungry or frustrated.
Right now he's in my basement with one of his computers. I can hear him down there talking to the computer. If he's online, he may be talking to his dad.
Meanwhile, the oldest daughter is in Texas helping my parents clean out the house of my mother's oldest brother, who passed away earlier this spring. It's been a job involving dumpsters and they are still not finished. Jess might get to see the Gulf of Mexico as a birthday present. She is going to love that. I might never get her to come home, lol.
My younger daughter has been dividing her time between helping me with Matt, helping me with a house I need to empty and college visits. We've just begun the college visit season with about 6 more visits scheduled. I'm sure we will be filling out paperwork sometime in September for the ones she liked best. So far, ISU is in the top 5.
Love this picture of one of my sunflowers with the bees. My garden took a hit earlier this week with a very windy rainstorm. I lost half of one of my pepper plants and picked up three green tomatoes from plants that were knocked over. Everything will be fine. Next year, 3 garden beds and I will put more soil in the pots so they tip less. I can't wait for next year's garden season, but then there will be January for planning it.
And, for planning my landscaping. Since big projects are somewhat out of my scope, I chose one area of the yard to work in. I still have a ways to go, but the long-term goal is to have garden space for herbs and vegetables. Second, to have enough annuals, perennials and biennials for a nice cutting bed for flowers.
I truly believe every family, no matter the income, should sit down two to three times a week at a table together. I also think flowers really make a difference. Sometimes they start the dinner conversation, but it's the conversation that should become the feature. Talking with one's children and taking them seriously, it really makes a difference. And, since my table flowers are a regular feature, I will let one of the kids pick the flowers out and arrange them if they want, too.
Now I'm off for the next part of my day. I have a disability appeal. It has been so difficult not to think about it all the time, but I've just been working to pass it to my higher power and trust that the right thing will happen, and then to focus on the things I really can change.
Laura
Wednesday, July 17, 2013
Sewing & Life
Life in general is a lot like mending a pair of pants.
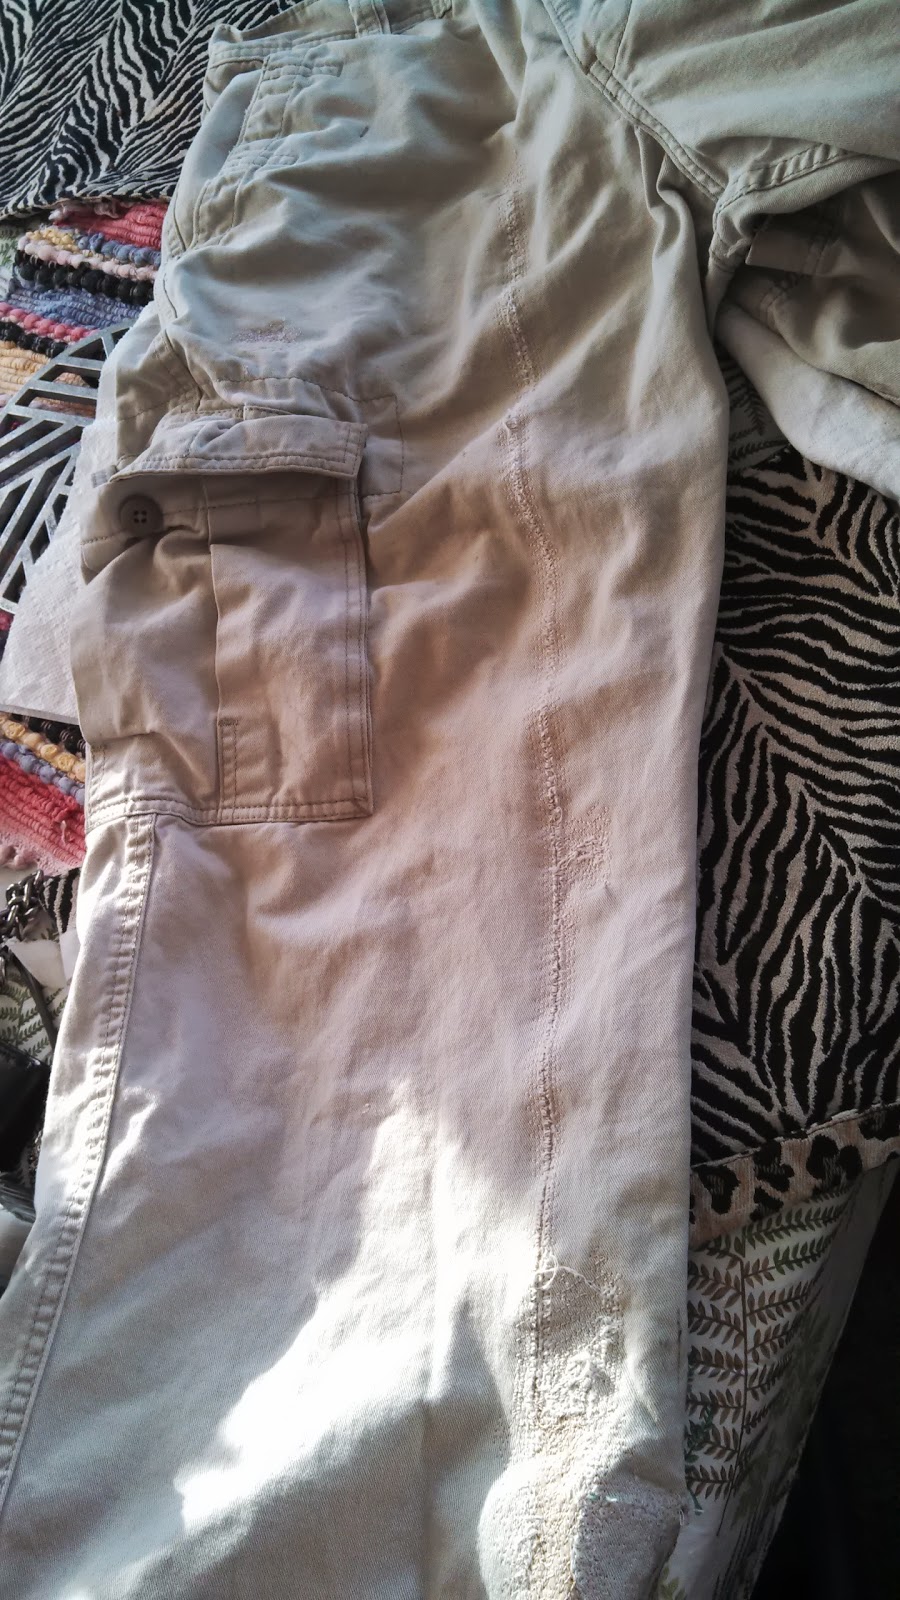
These are a pair of my son's pants. Somehow he managed to rip them in two places all the way from the hem to the hip. He was going to toss them out because he couldn't see fixing them.
Sometimes life gets mess and looks shredded around the edges, too. Like my son's life ... he met a girl at his local malmart. I don't know much about her; never met her. Meanwhile, she took his debit card and spent 300+ of his money, leaving him with nothing to pay his rent. He even got seriously drunk and told off all his family.
The landlord's agent finally managed to kick the girl from his apartment, but the damage was already done. He may end up without internet, television or phone for a while. He did finally call me, though it's taken 10 or so days to finally get the whole story, or what seems to be most of it anyways.
Like mending clothes, you can mend family relationships. It might not be as easy as mending a pair of pants, but it's usually worth it in the end.

While your relationship with your family isn't quite the same, it is nice to know they are there for you even when you've made some mistakes.
In the realm of mending, we're going to be working on mending his relationship with his bank, his landlord and his utilities. Then with his doctors and social services. We've already banded together to clean his apartment. I don't think I've ever seen it this clean, ever. We even took every stitch of laundry from every spot we could find it and brought it to my house where we're working on washing EVERY thing.
And, we do mean everything ... blankets, bedding, towels, kitchen towels, unders, socks, socks and more socks, pants and an endless trail of tee shirts. And, in the folding process, we are sorting and mending tears and holes.
Did I mention I'm tired of laundry??

And, that's only part of it. It will be so nice to have a clean living room again. Most of what you see will leave when we take Matt home. The rest will either have homes in my house or be in a box for my niece to see if any fit her.
And, to make my morning ... my morning glories bloomed today in shades or purple, blue and white streaks and I think there will be a fuchsia one tomorrow ... definitely need pictures! My tomatoes are just beginning to turn. I've been getting banana peppers in piles. My basil plants have been supplying enough that I could give it away if I knew someone who'd use it, meanwhile, it looks nice in the jar in my kitchen window.
Laura
These are a pair of my son's pants. Somehow he managed to rip them in two places all the way from the hem to the hip. He was going to toss them out because he couldn't see fixing them.
Sometimes life gets mess and looks shredded around the edges, too. Like my son's life ... he met a girl at his local malmart. I don't know much about her; never met her. Meanwhile, she took his debit card and spent 300+ of his money, leaving him with nothing to pay his rent. He even got seriously drunk and told off all his family.
The landlord's agent finally managed to kick the girl from his apartment, but the damage was already done. He may end up without internet, television or phone for a while. He did finally call me, though it's taken 10 or so days to finally get the whole story, or what seems to be most of it anyways.
Like mending clothes, you can mend family relationships. It might not be as easy as mending a pair of pants, but it's usually worth it in the end.
While your relationship with your family isn't quite the same, it is nice to know they are there for you even when you've made some mistakes.
In the realm of mending, we're going to be working on mending his relationship with his bank, his landlord and his utilities. Then with his doctors and social services. We've already banded together to clean his apartment. I don't think I've ever seen it this clean, ever. We even took every stitch of laundry from every spot we could find it and brought it to my house where we're working on washing EVERY thing.
And, we do mean everything ... blankets, bedding, towels, kitchen towels, unders, socks, socks and more socks, pants and an endless trail of tee shirts. And, in the folding process, we are sorting and mending tears and holes.
Did I mention I'm tired of laundry??
And, that's only part of it. It will be so nice to have a clean living room again. Most of what you see will leave when we take Matt home. The rest will either have homes in my house or be in a box for my niece to see if any fit her.
And, to make my morning ... my morning glories bloomed today in shades or purple, blue and white streaks and I think there will be a fuchsia one tomorrow ... definitely need pictures! My tomatoes are just beginning to turn. I've been getting banana peppers in piles. My basil plants have been supplying enough that I could give it away if I knew someone who'd use it, meanwhile, it looks nice in the jar in my kitchen window.
Laura
Tuesday, July 9, 2013
An Open Note To My Oldest Son

This is my oldest son Matthew. He escorted me down the aisle, him on one side and my younger son opposite. He's been a pillar of strength for me over the last year, but maybe he doesn't know how much it's appreciated.
Last week, Matt's friends kind of set him up with a young lady about his own age. As far as I can/could tell, he was very taken with her and I think it's a good thing.
I don't know anything about this young lady. My son, though, wanted to bring her everywhere he went. I chalked this up to being a new relationship, until he wanted to bring her mowing with him.
Mowing. Sounds simple. It's not. We were going to mow a lot in West Brooklyn, IL, were there is no power, no water, no toilet. In fact, West Brooklyn is so small, there's not much of anything except a bank. I had a very tiny house there once, which is now in some serious need of either a complete rebuild frame up or a complete tear down.
I can't say it's not some place to take a first date, because the first place I took my new, then boyfriend, now husband, was to see what I thought was one of my not-so-great aspects. But for me to take my son's new girlfriend? I don't think so.
We would be mowing and I wasn't sure what condition the property would be in. I wasn't sure if mowers would do or I would need a brush hog. There are lots of dips in the land and not a lot of places to be out of the way. If you don't know your way around, it's easy to turn an ankle and not really close (12 miles) to a hospital.
My oldest son has psycho-effective disorder, rather like psychosis. He doesn't always grasp some concepts easily, like liability. It's one thing to be liable for my own children, but quite another to be liable for someone else's.
So, Matt, I'm very sorry I couldn't take your friend there, but I wouldn't probably take your friend Dave either. It's really one thing to take you or any of the other children, but it's really something different to be responsible for someone else's, especially when you know nothing about them.
So, I think my son feels that I don't like that he's dating and don't support his decisions, when that is really furthest from the truth. I'm comfortable with my son dating. I'd like to get to know his date first before taking her places that my liability might be extreme, though I realize that my son didn't consider liability to be an issue, or give me an opening to explain it.
So, Matt ... if you read this ... it really comes down to needing to meet your new friend and the fact that I cannot afford the liability issues to take your new friend to places I own. But, I love you bunches!
Laura
Monday, July 8, 2013
Mending and other stories
This morning I can hear the rain and hear Steve sigh, probably thinking it's going to rain all day and they will get further behind at work.
Yesterday, I spent part of the day doing all the mending I had accumulated. Three of Steve's shirts, two of mine, two underthings that needed new hems, done. About a week ago, I changed out a plastic cabinet for a beautiful wood dresser that matches my dining room hutch. Since my girls were here, knew I wouldn't be able to re-arrange that room by myself, or for that matter, bring the dresser in, they volunteered.
Before I dashed off into the kitchen, I gave them a rough idea of what I was thinking and then a handful of large baskets to move things out of the way to the basement. Then my dining room became a hive of busy children, moving baskets, moving furniture and doing that giggling cursing thing that people do when they moving things for someone else.
They were able to move both large sewing machines and change out the table the serger was on. They brought in the new dresser and found a home for it. It may not stay there, but it does look so much nicer than that plastic cabinet that was taped up the front. And, after all, when you are eating in your sewing room, looking classy helps. Removing clutter also helps.
I am never going to be able to say I'm completely without clutter, but I'm working on having homes for those things I simply must keep. I've also been working hard on getting rid of things that I don't need or have a home for. The best question I've used to pare down my things is "and where will it go?" If I can't answer that question with a good answer, one besides the attic or the basement, I seriously consider getting rid of the item.
The harder part of getting caught up is overtaxing yourself. Last week, we ended up making a mad dash to another house and found it overgrown to the point of needing to rent a brush hog to mow it down. Brush hogs are awesome, but very wearing. The bruises are still coming up and Steve finds them everywhere, like half dozen new ones every day since. I'm so still today, I'm seriously considering staying at home.
Now, besides bruises, brush hogs, mending and cooking, I managed to pour a whole cup of coffee into my side table. *Frown* This meaning I now had no excuse not to remove the top of said side table and get working on it's new one. So, outside it went. I can say that the top is now stripped off and due to the rain, it's probably as clean as it will get. Now to cut about 100 small Formica samples into squares and glue them all down, but first, I think I should sand the top down and fill any low places with Durham's and sand some more.
I already have a large polished piece of glass I found in a neighbor's trash that is perfect for putting on top the new top once it's dry and the base re-stained. In the meantime, my living room looks like a hurricane blew in because everything that was in the table is now all over the floor. I think I'm at least going to put it into a basket or something to at least *look* presentable.
That being said, I think I'm going to get on that...
Laura
Saturday, July 6, 2013
Fresh Ravioli
I always read those packaged ravioli that say serving size is like 3 or 5 ravs, but trying it with store-bought can be disappointing. The filling is usually barely there and the pasta, even if well cooked, lacks any heartiness. The solution for this is to make your own, and seriously, it's easy.

I start with the filling for the ravioli. I used well-trimmed gizzards (about 3/4 lb.), fresh globe basil from my garden, three slices from the beef roast and about 1 Tbsp. grated diakon radish. A little parsley chopped fine and added with 6 oz. tomato sauce and 2 oz. water to flavor the meat. The green, red and banana (sweet) peppers are for the sauce.

I brought the sauce up to a boil, then added the gizzard meat and beef, chopped very small, stirred once, then turned the heat down to medium. The idea is for them to simmer until tender and then run them through the blender to make fine enough for filling. When I put the meat in the blender, I did my best to leave the tomato sauce in the pan.

You want your filling mix to be on the finer side but not wet. Put this aside while you make the sauce and pasta. My sauce started with leftover tomato sauce from making the filling. I sliced the remaining roast into petit steaks. I also used half a jar of Four Cheese pasta sauce (for the two of us, we really don't need a whole jar).

Here are all my various peppers, sliced thinly, bite size and added to the pan just after the steaks. Get a little brown on both sides of the steak, then add the peppers and turn the heat down before adding the pasta sauce. Once you've added the pasta sauce, stir and cover, turn the heat to low and let simmer while you make pasta.

Pasta dough is so easy to make it's ridiculous. I think my next purchase should be the pasta roller for my Kitchenaid mixer so I can make my own spaghetti noodles. Into your mixer, start with 2 cups flour and into a separate cup, break 4 eggs. Breaking them into a separate cup assures no eggshell pieces get into the dough. Start the mixer and add 2 Tbsp. oil to the mixer and let it do it's thing. Slowly add the last cup of flour. Occasionally, you will need to turn the mixer off and scrap down the sides and turn the bottom. Keep working until dough forms a raggy ball. Turn onto a little flour on your counter, knead a bit until smooth and cover with plastic wrap to let it rest without drying out.
To make raviolis, start by preparing a couple sheet pans with a layer of flour or cornmeal to prevent sticking. You need at least 2 because you can't layer these before cooking. Second, cut your ball of dough into 2 to 4 pieces, put the rest back under the wrap and work the first piece into a flat circle. With your rolling pin, roll dough out really thin, like 1/4 inch or less. Cut the dough into bunches of little squares and try to keep them the same size.
Take another egg and break it into a measuring cup, whisk it with a fork, then get a pastry brush to brush the ravioli. Then every other square gets about 1/2 to 1 tsp. filling. I used small bites of filling because I was serving them with steak; I think if I was just serving ravs, I'd have used quite a bit more filling. Put the empty square on top a filled square and press together to seal the edges around filling. Take each square and set on your prepped pans until ready to boil. Repeat until dough and filling are used up. The dough can also be refrigerated or frozen.

Since you can't put a lot of ravioli in the pan at a time, I pulled my largest saucepan and filled it about 2/3rds the way up with Cold water and salt. Let come to a boil, then add 3 to 4 ravs to the boiling water. The water should slow it's boil, then return as the pasta gets hot. Ravs will sink to the bottom of the pot, but as soon as they are ready, they will rise to the surface. The easiest way I've found to strain ravioli is to use a Chinese mesh scoop (for frying in a wok).

I put a little bit of butter over each batch of raviolis to keep them from sticking to each other. These are a fairly large. Toss them occasionally while you add each batch to be sure they aren't sticking, but try to keep the amount of butter down to just enough to lightly coat surfaces.

Once you've completely boiled all your raviolis, adjust the seasoning on your sauce and serve. Then, hope that you have leftovers for breakfast.

These are just as good the next day. I had a couple for breakfast. I think these would also be awesome made into fried ravioli, lightly buttered, dipped in seasoned panko crumbs and baked on a greased baking sheet until golden and crisp.
Ravioli Dough
From FoodNetwork.com
3 cups flour
1 tsp. salt
4 eggs
2 Tbsp. Olive oil
1 yolk, for egg washed (I used a whole egg rather than waste half an egg)
Combine flour & salt.
Add eggs one at a time and continue to mix. Then drizzle oil into mixer and add flour until forms a ball. Knead until smooth and elastic. Wrap in plastic wrap and let rest 30 minutes before shaping.
Cut in half (I divided mine into thirds). Dust counter with flour and roll into rectangle. Brush surface with egg wash. Drop 1 Tbsp. filling apx. 2 inches apart on half the sheet of pasta. Top with other half, gently press out air pockets and form a seal.
Cook in salted water 10 to 15 minutes. Do not over crowd pan. They will float once cooked.
You can use any combination of things you like for your filling ... cheeses, Italian sausage, minced vegetables ... I created the beef-gizzard blend because I had gizzards in the freezer and needed a way to serve them in a manner my husband would eat them, or in other words, hide them. Sorry Hun!!
Laura
I start with the filling for the ravioli. I used well-trimmed gizzards (about 3/4 lb.), fresh globe basil from my garden, three slices from the beef roast and about 1 Tbsp. grated diakon radish. A little parsley chopped fine and added with 6 oz. tomato sauce and 2 oz. water to flavor the meat. The green, red and banana (sweet) peppers are for the sauce.
I brought the sauce up to a boil, then added the gizzard meat and beef, chopped very small, stirred once, then turned the heat down to medium. The idea is for them to simmer until tender and then run them through the blender to make fine enough for filling. When I put the meat in the blender, I did my best to leave the tomato sauce in the pan.
You want your filling mix to be on the finer side but not wet. Put this aside while you make the sauce and pasta. My sauce started with leftover tomato sauce from making the filling. I sliced the remaining roast into petit steaks. I also used half a jar of Four Cheese pasta sauce (for the two of us, we really don't need a whole jar).
Here are all my various peppers, sliced thinly, bite size and added to the pan just after the steaks. Get a little brown on both sides of the steak, then add the peppers and turn the heat down before adding the pasta sauce. Once you've added the pasta sauce, stir and cover, turn the heat to low and let simmer while you make pasta.
To make raviolis, start by preparing a couple sheet pans with a layer of flour or cornmeal to prevent sticking. You need at least 2 because you can't layer these before cooking. Second, cut your ball of dough into 2 to 4 pieces, put the rest back under the wrap and work the first piece into a flat circle. With your rolling pin, roll dough out really thin, like 1/4 inch or less. Cut the dough into bunches of little squares and try to keep them the same size.
Take another egg and break it into a measuring cup, whisk it with a fork, then get a pastry brush to brush the ravioli. Then every other square gets about 1/2 to 1 tsp. filling. I used small bites of filling because I was serving them with steak; I think if I was just serving ravs, I'd have used quite a bit more filling. Put the empty square on top a filled square and press together to seal the edges around filling. Take each square and set on your prepped pans until ready to boil. Repeat until dough and filling are used up. The dough can also be refrigerated or frozen.
Since you can't put a lot of ravioli in the pan at a time, I pulled my largest saucepan and filled it about 2/3rds the way up with Cold water and salt. Let come to a boil, then add 3 to 4 ravs to the boiling water. The water should slow it's boil, then return as the pasta gets hot. Ravs will sink to the bottom of the pot, but as soon as they are ready, they will rise to the surface. The easiest way I've found to strain ravioli is to use a Chinese mesh scoop (for frying in a wok).
I put a little bit of butter over each batch of raviolis to keep them from sticking to each other. These are a fairly large. Toss them occasionally while you add each batch to be sure they aren't sticking, but try to keep the amount of butter down to just enough to lightly coat surfaces.
These are just as good the next day. I had a couple for breakfast. I think these would also be awesome made into fried ravioli, lightly buttered, dipped in seasoned panko crumbs and baked on a greased baking sheet until golden and crisp.
Ravioli Dough
From FoodNetwork.com
3 cups flour
1 tsp. salt
4 eggs
2 Tbsp. Olive oil
1 yolk, for egg washed (I used a whole egg rather than waste half an egg)
Combine flour & salt.
Add eggs one at a time and continue to mix. Then drizzle oil into mixer and add flour until forms a ball. Knead until smooth and elastic. Wrap in plastic wrap and let rest 30 minutes before shaping.
Cut in half (I divided mine into thirds). Dust counter with flour and roll into rectangle. Brush surface with egg wash. Drop 1 Tbsp. filling apx. 2 inches apart on half the sheet of pasta. Top with other half, gently press out air pockets and form a seal.
Cook in salted water 10 to 15 minutes. Do not over crowd pan. They will float once cooked.
You can use any combination of things you like for your filling ... cheeses, Italian sausage, minced vegetables ... I created the beef-gizzard blend because I had gizzards in the freezer and needed a way to serve them in a manner my husband would eat them, or in other words, hide them. Sorry Hun!!
Laura
Subscribe to:
Posts (Atom)